Get a Free Estimate Now!
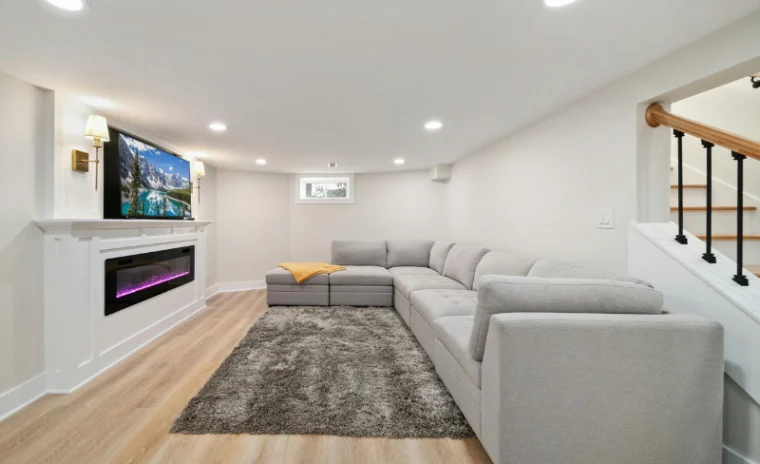
Turn Unused Square Footage Into Your Dream Living Area
Assess Moisture Levels and Waterproofing Needs Before Anything Else
Basements in the Mid-Missouri region face unique moisture challenges due to seasonal flooding patterns and the area’s clay-heavy soil composition, which retains water near foundation walls. Before purchasing materials or planning layouts, spend several weeks monitoring your basement for dampness, especially after heavy spring rains when water tables rise.
Check for efflorescence (white mineral deposits), musty odors, or visible water stains on walls and floors. Run a dehumidifier and measure ambient humidity; readings above 60 percent indicate ventilation or drainage problems that must be resolved first. Examine exterior grading to ensure water flows away from your foundation, and inspect sump pump operation if one is installed.
For homes near Lake of the Ozarks or in low-lying areas around Versailles, a professional foundation inspection often reveals hidden drainage issues that DIY fixes cannot address. Interior waterproofing membranes, exterior excavation, and foundation crack repair typically require specialized equipment and warranty-backed solutions. Skipping this step leads to mold growth, ruined finishes, and structural damage within months of completing your project.
Design a Functional Layout That Maximizes Usable Space
Map out your basement’s usable square footage, accounting for mechanicals, support columns, stairwell clearance, and ceiling height restrictions. Most Missouri basements have seven to eight-foot ceilings; after adding framing, insulation, and drywall, finished ceiling height drops to around six feet nine inches. Plan room functions around these constraints rather than forcing layouts that feel cramped.
Identify areas where ductwork, plumbing stacks, or electrical panels limit overhead clearance. These zones work well as storage closets, utility rooms, or bar areas where full standing height is unnecessary. Reserve the most open areas for living spaces, home offices, or recreation rooms where occupants spend extended time.
Consider natural light sources and egress requirements. Building codes in Morgan County and surrounding jurisdictions require basement bedrooms to have emergency egress windows with specific size and height parameters. If your layout includes sleeping areas, factor in the cost and placement of egress window installation early in the design phase. Sketch multiple layout options on graph paper before committing, measuring twice to avoid costly mid-project redesigns.
Install Drywall and Finish Surfaces for a Polished Appearance
Hang moisture-resistant drywall (green board or purple board) in basements to reduce mold risk, starting with ceiling panels and working down to walls. Use drywall screws driven flush without breaking the paper face, placing fasteners every twelve inches along studs and every eight inches on ceilings. Stagger seams between adjacent rows and avoid placing seams over doors or windows where stress concentrates.
Apply joint compound in three coats, allowing proper drying time between applications. First coat embeds tape; second coat covers fasteners and feathers edges; third coat smooths imperfections for painting. Sand lightly between coats using fine-grit paper and a dust mask, inspecting surfaces under raking light to identify low spots requiring additional compound.
Quality drywall finishing requires patience, the right tools, and an eye for detail most DIY enthusiasts underestimate. Visible seams, popped screws, and uneven surfaces ruin an otherwise successful project. If your schedule or skill level makes professional finishing worthwhile, contractors complete the work faster with superior results, freeing you to focus on trim, painting, and other finish tasks that better suit a homeowner’s capabilities and timeline.
Choose Flooring and Add Trim for A Finished, Livable Space
Select basement flooring that tolerates moisture and temperature fluctuations common below grade. Luxury vinyl plank (LVP) offers durability, water resistance, and realistic wood appearance at moderate cost. Engineered hardwood works in dry basements with stable humidity control, while ceramic tile provides a permanent, waterproof solution for wet-prone areas. Avoid solid hardwood and laminate products that warp or delaminate when exposed to moisture.
Install flooring over a vapor barrier and subfloor system that allows airflow beneath the finished surface. Concrete floors transmit cold and dampness; a proper underlayment adds comfort, insulation, and protection for your flooring investment. Leave expansion gaps around perimeter walls according to manufacturer specifications, covering gaps with baseboard trim after flooring installation is complete.
Finish the space with door and window casing, baseboard, and crown molding painted or stained to match your design vision. Add door hardware, switch plates, and outlet covers for a polished, move-in-ready appearance. If your project scope, timeline, or budget has grown beyond initial expectations, DJB Construction provides full-service remodeling from foundation to finish, handling permits, inspections, and trades coordination so your basement transformation stays on schedule and meets professional quality standards.
Insulate Walls and Rim Joists to Control Temperature and Moisture
Proper insulation transforms a damp, cold basement into comfortable living space while reducing heating and cooling costs. Install rigid foam insulation against foundation walls, leaving an air gap or using products with built-in drainage channels to manage condensation. Seal rim joists with spray foam or cut-to-fit rigid foam panels, eliminating the primary source of air infiltration and heat loss in basement spaces.
Use closed-cell foam in high-moisture areas and around windows, while open-cell or batt insulation works for interior partition walls and above-grade sections. Check local code for required R-values; Missouri typically requires R-10 to R-15 for basement walls depending on the jurisdiction and intended use.
Avoid fiberglass batts against concrete or block walls. These materials absorb moisture, compress over time, and provide habitat for mold growth. In the humid Mid-Missouri climate, vapor barriers must be installed on the warm side of insulation to prevent condensation within wall cavities. Improper vapor barrier placement traps moisture and accelerates rot in framing members. For complex insulation scenarios or spray foam application, professional installation ensures proper coverage, curing, and code compliance throughout your project.